Getting Started on Shopify
Install Retail Cloud Connect™
- Sign in to the Shopify store account
- Visit the Retail Cloud Connect™ listing on the Shopify App Store, then click Install
- Review the Terms & Conditions, Privacy Policy, and required Retail Cloud Connect Shopify App permissions
- Click Install app to accept and continue
Default Setup
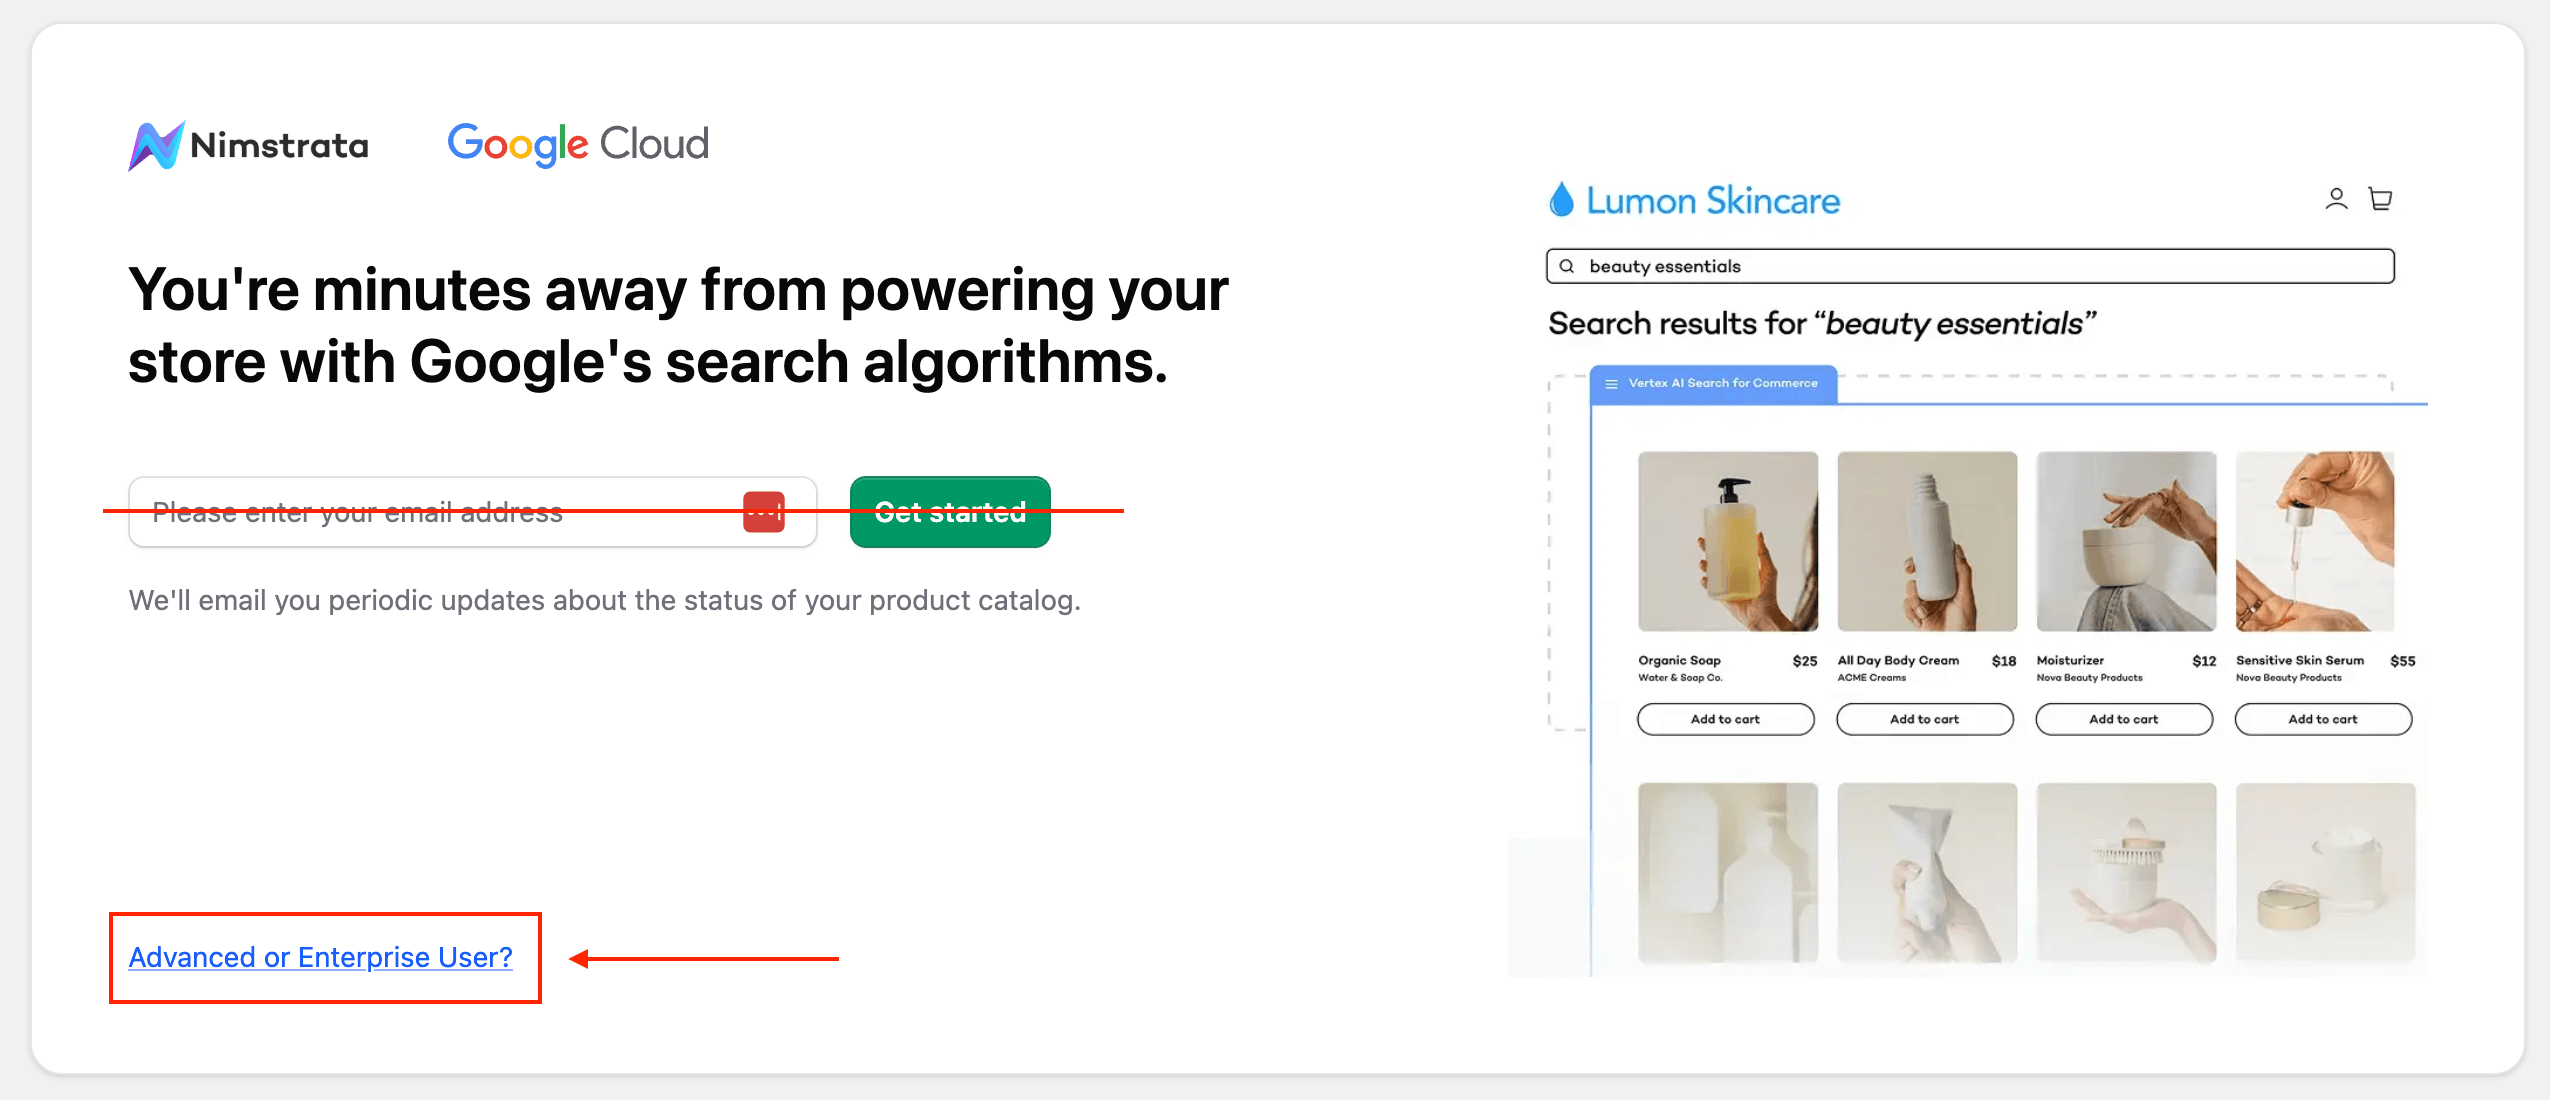
The standard Retail Cloud Connect setup uses a Nimstrata-managed Google Cloud environment with billing handled through Shopify. Merchant teams that manage their own Google Cloud project should use the Advanced or Enterprise Merchants path instead.
To begin, the merchant enters an email address and clicks Get Started. The app creates the managed Retailer and Shopify shop connection, then runs an initial discovery/import flow against the catalog.
The discovery screen estimates progress from Shopify variant count and import progress. Large stores can take longer, but the page does not need to stay open after the job has started.
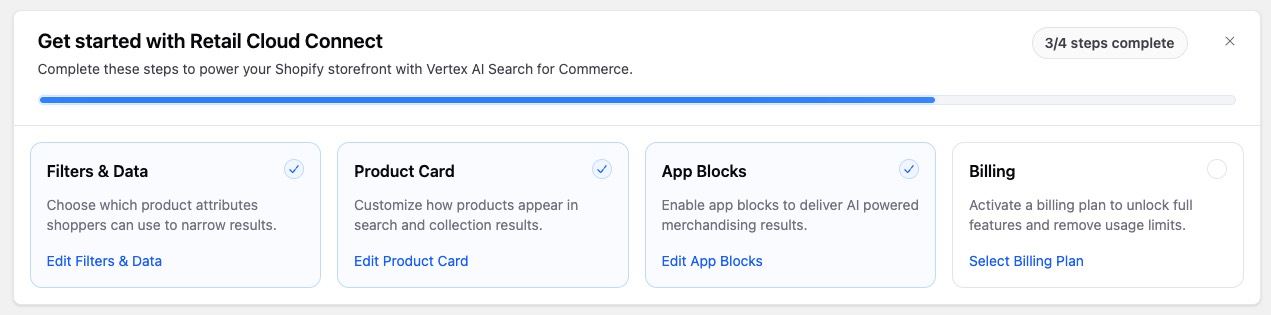
Once Retail Cloud Connect has reviewed the catalog, continue with Filters & Data to configure import and storefront filters. After the first import begins, return to the Retail Cloud Connect Shopify App page for the rest of the setup flow, including Translations, building the product card, installing App Blocks onto the theme, and activating billing.
Advanced or Enterprise Merchants
Merchants with an existing Google Cloud relationship may prefer the advanced connectivity flow. This path lets retailers:
- Maintain full control of the underlying Google Cloud environment
- Activate Recommendations AI models
- Receive dedicated setup and support from Nimstrata
A Google Cloud Billing Account is required to activate the Retail API. Merchants may need to contact an IT administrator to set up Google Cloud and payment information. For assistance, schedule an onboarding call.
To begin the advanced setup process, do not enter an email address or click Get Started. Instead, click the Advanced or Enterprise User? link at the bottom of the welcome screen.
Create or Select a Retailer
Merchants managing multiple Shopify stores or development and staging environments can associate them all with the same Retailer. Each Shopify store requires a unique Google Cloud project.
- Choose a name for the Retailer. This is typically the company or organization name, then click Create Retailer
- If access to one or more Retailers already exists, select the existing Retailer and click Continue
Connect Google Cloud Environment
Follow the instructions in the app to set up the Google Cloud environment. The process guides merchants to:
- Create a new Google Cloud project for the Shopify catalog
- Enable Google Cloud billing and the Retail API on the new project
- Grant Nimstrata access to the Google Cloud environment
The fastest way to set up Google Cloud is to use Cloud Shell to run commands. Simply copy and paste the commands in the app for each step.
Each Shopify store requires a unique Google Cloud project.
If a project already exists in Google Cloud, enter the name in the Google Cloud Project ID field. Or, run the provided command to create a new project.
Follow the instructions in the provided video to activate billing, accept the AI Commerce Search terms and conditions, and enable the APIs.
Paste and run the provided Cloud Shell command to create the custom role Nimstrata uses to manage the catalog.
For more information about permissions in the merchant environment, review this summary.
Paste and run the provided commands to grant Retail Cloud Connect access to the Google Cloud project.
It can take up to two minutes for the previous commands to propagate.